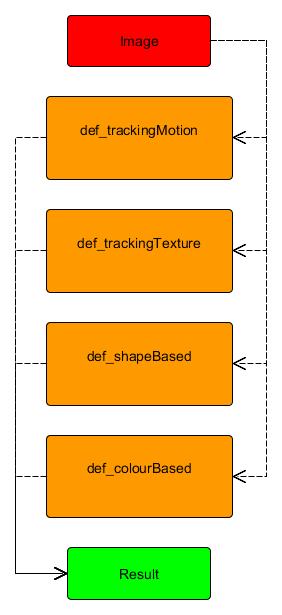
# Gavin Morrison & Modestas Jakuska - Image processing Project
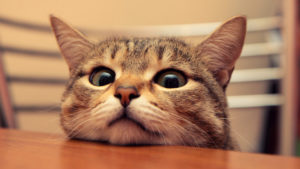
# Project objective: Find the left eye in the first image and track it through the image sequence.
# Methods used:
# 1. Template Matching.
# 2. Camshift
# 3. Gabor Filter
# 4. Colour Isolation
# Template Matching:
# Author: Gavin Morrison
# How it works: The object required within the image is found
# by comparing a smilar image.
# 1. Import image to be treated
# 2. Imported image converted to Grayscale
# 3. Import template image
# 4. Store width and height coordinates of template
# 5. OpenCV has a number of methods for template matching, I have chosen two which I have put into a list
# 6. Loop to implement the method
# 7. Perform match operation
# 8. Draw a rectangle around the matched area
# 9. Display the results
# Camshift:
# Author: Gavin Morrison
# How it works: Detects the density of a set of points provided by a back projection within the image being tracked, while checkig ize and rotation.
# 1. Import image to be treated
# 2. Copy of image to isolate region of interest
# 3. Coordinates of region of interest [row:row, column:column]
# 4. The region of interest is converted to HSV colour space
# 5. Create histogram of region of interest, using hue. The hue range is from 0 to 179.
# 6. Original image is converted to HSV colour space
# 7. Back projection used to create mask from the hue of the region of interest histogram.
# 8. Filter applied in an attempt to reduce noise in the mask (later addition)
# 9. The coordinates of our region of interest are assigned to variables.
# 10. Define criteria
# 11. Rectangle of tracking area is created using camshift function
# 12. These are the points for the rectangle
# 13. cv2.polylines used instead of 'cv2.rectangle' to accommodate rotation of bound space.
# 14. Display the processed image
# Gabor Filter:
# Author: Modestas Jakuska
# 1. Import image to be treated
# 2. Convert image to RGB
# 3. Convert image to Grayscale
# 4. Get 90 and 0 degree Gabor Images
# 5. Create a mask
# 6. Simplify image
# 7. Display the processed image
# Colour Isolation:
# Author: Modestas Jakuska
# Title: Skin Segmentation using YCrCb color range
# How it works:
# Convert image to YCbCr.
# Go through the image array and turn non-skin pixels black.
# Skin pixels are determined by their Cr and Cb values.
# 1. Select image
# 2. Convert BGR to RGB and then to YCrCb
# 3. Skin values taken from this paper:
# "Comparative Study of Skin Color Detection and Segmentation in HSV and YCbCr Color Space" by Khamar Basha Shaika, Ganesan P, V.Kalist, B.S.Sathish , J.Merlin Mary Jenitha
# They suggest using this range:
# 150 < Cr < 200 and 100 < Cb < 15
# 4. Create skinRegion, a binary image containing the skin region
# 5. Then superimpose the skin region onto the original image
# so that we can see the skin region with colour
# 7. Display the processed image
import sys
import numpy as np
import cv2
from matplotlib import pyplot as plt
import easygui
# Menu code written by Gavin Morrison D12124782
def main_menu():
print("\nPlease select your Tracking method from the menu:\n")
print("1. Template Matching")
print("2. Camshift")
print("3. Gabor Filter")
print("4. Colour Isolation")
print("5. Exit")
while True:
try:
selection=int(input("\nPlease enter your choice... "))
if selection==1:
template_matching()
break
elif selection==2:
camshift()
break
elif selection==3:
gabor_filter()
break
elif selection==4:
colour_isolation()
break
elif selection==5:
break
else:
print("\nInvalid choice. Please enter 1-5")
main_menu()
except:
print("\nInvalid choice. Please enter 1-5")
exit
def template_matching():
# Code written by Gavin Morrison D12124782
# Opening an image using a File Open dialog:
# f = easygui.fileopenbox()
# I = cv2.imread(f)
# Import image to be treated
original_image = cv2.imread("Ilovecats3.bmp")
# Imported image converted to Grayscale
original_image_grayscale = cv2.cvtColor(original_image, cv2.COLOR_BGR2GRAY)
# Import template image
left_eye_template = cv2.imread("leftEye.bmp", 0)
# Store width and height coordinates of template
width, height = left_eye_template.shape[::-1]
# OpenCV has a number of methods for template matching, I have chosen two which I have put into a list
templateMatchingMethods = ['cv2.TM_CCORR_NORMED', 'cv2.TM_CCOEFF_NORMED']
# Loop to implement the method
for method in templateMatchingMethods:
methods = eval(method)
# Perform match operation
result_1 = cv2.matchTemplate(original_image_grayscale, left_eye_template, methods)
min_val, max_val, min_loc, max_loc = cv2.minMaxLoc(result_1)
top_left_1 = max_loc
bottom_right_1 = (top_left_1[0] + width, top_left_1[1] + height)
# Draw a rectangle around the matched area
cv2.rectangle(original_image, top_left_1, bottom_right_1, (0,0,255), 2)
# Display the results
finished_image = cv2.cvtColor(original_image, cv2.COLOR_BGR2RGB)
plt.subplot(111),plt.imshow(finished_image,cmap = 'gray'), plt.title('Template Matching Result'), plt.xticks([]), plt.yticks([])
plt.show()
raw_input("Please press enter to return to Main Menu")
main_menu()
def camshift():
# Code written by Gavin Morrison D12124782
# Opening an image using a File Open dialog:
# f = easygui.fileopenbox()
# I = cv2.imread(f)
# Import image to be treated
original_image = cv2.imread("Ilovecats1.bmp")
# Copy of image to isolate region of interest
tracking_image = cv2.imread("Ilovecats1Copy.bmp")
# Coordinates of region of interest [row:row, column:column]
region_of_interest = tracking_image[125: 160, 210: 250]
# Coordinates for right eye
# region_of_interest = tracking_image[125: 175, 145: 200]
# The region of interest is converted to HSV colour space
HSV_region_of_interest = cv2.cvtColor(region_of_interest, cv2.COLOR_BGR2HSV)
#Create histogram of region of interest, using hue. The hue range is from 0 to 179.
region_of_interest_histogram = cv2.calcHist([HSV_region_of_interest], [0], None, [180], [0, 180])
#Original image is converted to HSV colour space
original_image_HSV = cv2.cvtColor(original_image, cv2.COLOR_BGR2HSV)
# Back projection used to create mask from the hue of the region of interest histogram
mask = cv2.calcBackProject([original_image_HSV], [0], region_of_interest_histogram, [0, 180], 1)
# Filter applied in an attempt to reduce noise in the mask (later addition)
filter_kernel = cv2.getStructuringElement(cv2.MORPH_ELLIPSE, (3, 3))
mask = cv2.filter2D(mask, -1, filter_kernel)
_, mask = cv2.threshold(mask, 10, 255, cv2.THRESH_BINARY)
# The coordinates of our region of interest are assigned to variables
row = 210
column = 125
width = 250 - row
height = 160 - column
# Coordinates for right eye
# row = 145
# column = 125
# width = 200 - row
# height = 175 - column
# define criteria
criteria = (cv2.TERM_CRITERIA_EPS | cv2.TERM_CRITERIA_COUNT, 10,1)
#rectangle of tracking area is created using camshift function
rectangle, tracking_area = cv2.CamShift(mask, (row, column, width, height), criteria)
#These are the points for the rectangle
points = cv2.boxPoints(rectangle)
points = np.int0(points)
# cv2.polylines used instead of 'cv2.rectangle' to accommodate rotation of bound space.
cv2.polylines(original_image, [points], True, (0, 255, 0), 2)
# Display our processed image
finished_image = cv2.cvtColor(original_image, cv2.COLOR_BGR2RGB)
plt.subplot(111),plt.imshow(finished_image,cmap = 'gray'), plt.title('Camshift'), plt.xticks([]), plt.yticks([])
plt.show()
raw_input("Please press enter to return to Main Menu")
main_menu()
def gabor_filter():
# Sorting def. taken (and modified) from Geeks for Geeks
# URL: https://www.geeksforgeeks.org/python-sort-list-according-second-element-sublist/
def Sort(sub_li):
circlesList.sort(key = lambda x: x[0])
return sub_li
input_image = cv2.imread("test.bmp")
rgb = cv2.cvtColor(input_image, cv2.COLOR_BGR2RGB)
gray = cv2.cvtColor(input_image, cv2.COLOR_BGR2GRAY)
height, width, colourChannes = input_image.shape
# Get 90 and 0 degree Gabor Images
g_kernel_90 = cv2.getGaborKernel((30, 30), 4.0, np.pi/2, 10.0, 0.5, 0, ktype=cv2.CV_32F)
g_image_90 = cv2.filter2D(gray, cv2.CV_8UC3, g_kernel_90)
# Create a mask
kernel = np.ones((10,10),np.uint8)
mask = cv2.bitwise_not(g_image_90)
mask = cv2.dilate(mask, kernel, iterations = 1) # Dilate to include eyes
cropped = cv2.bitwise_and(gray,gray,mask = mask)
# Simplify image
cropped[cropped < 100] = 0
cropped[cropped > 100] = 255
circles = cv2.HoughCircles(cropped, cv2.HOUGH_GRADIENT,1,20,
param1=10, param2=10, minRadius=0, maxRadius=10)
circles = np.uint16(np.around(circles))
circlesList = list(circles[0])
bestGuess = Sort(circlesList)[0] # Get leftmost circle
cv2.circle(rgb,(bestGuess[0], bestGuess[1]),bestGuess[2]+20,(500),2)
plt.subplot(111)
plt.imshow(rgb)
plt.title("Output Image")
plt.show()
raw_input("Please press enter to return to Main Menu")
main_menu()
def colour_isolation():
# Author: Modestas Jakuska
# Title: Skin Segmentation using YCrCb color range
# How it works:
# Convert image to YCbCr.
# Go through the image array and turn non-skin pixels black.
# Skin pixels are determined by their Cr and Cb values.
# Select image
f = easygui.fileopenbox()
I = cv2.imread(f)
# Convert BGR to RGB and then to YCrCb
I = cv2.cvtColor(I, cv2.COLOR_BGR2RGB)
YCC = cv2.cvtColor(I, cv2.COLOR_RGB2YCR_CB)
# Skin values taken from this paper:
# "Comparative Study of Skin Color Detection and Segmentation in HSV and YCbCr Color Space" by Khamar Basha Shaika, Ganesan P, V.Kalist, B.S.Sathish , J.Merlin Mary Jenitha
# They suggest using this range:
# 150 < Cr < 200 and 100 < Cb < 15
min_val = np.array([0,150,100],np.uint8)
max_val = np.array([255,200,150],np.uint8)
# Create skinRegion, a binary image containing the skin region
# Then superimpose the skin region onto the original image
# so that we can see the skin region with colour
skinRegion = cv2.inRange(YCC,min_val,max_val)
skinRegion = cv2.bitwise_and(I, I, mask = skinRegion)
plt.subplot(121)
plt.imshow(I)
plt.title("Input Image")
plt.subplot(122)
plt.imshow(skinRegion)
plt.title("Skin Region")
plt.show()
raw_input("Please press enter to return to Main Menu")
main_menu()
main_menu()


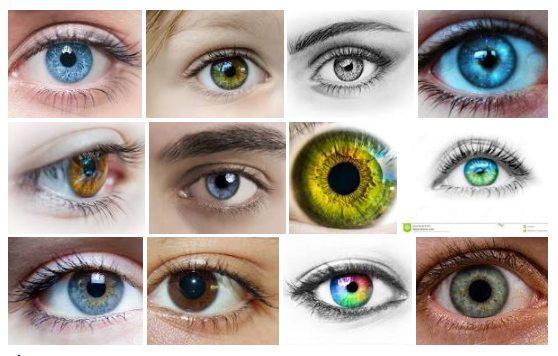




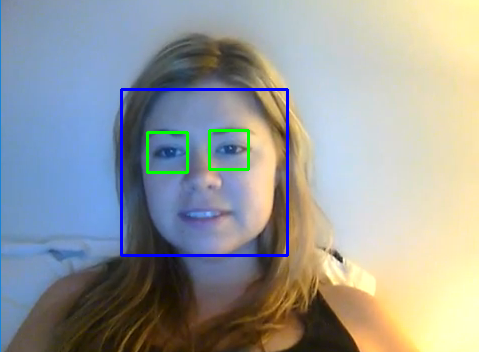 OpenCV has it’s own trainer and detector which can be used to train your own classifier, which in our case would need to track the left eye of a person over a series of three images.
